Hopalong Hollow....

Hopalong Hollow, where the Blueberries grow sweet, and the moss feels soft beneath your feet.

Showing posts with label dollhouse. Show all posts

Sunday, January 15, 2017

Dabbing on the daub

Plaster work!  In other words....
 a messy job. I enjoy it.  Here, I am putting on the first coat.

This plaster is a mixture of Acrylic paint and coarse pumice gel. I mixed my paint to get exactly the shade I wanted. I did not want to go with white. Many original Tudor homes were actually plastered in quite bright colors, shades of pink and yellows. I want a more muted beige, tint of yellow, OLD look.  I had to mix in 6 different colors until I found the right shade. 

I used all these brushes while working on the plaster.


The plaster requires 2 coats, first coat must dry completely before continuing.  On the second coat, you can daub it in to create a texture.


The acorn cap roofing on this bay window doesn't look as tidy as the pinecone roofing, but I still like it for the house of a mouse. (She put those nuts in a barrel in the root cellar.)
The second coat really does the job.
The little bricks that show through the plaster are something of a trademark in my books. Everyone has this "problem" in the homes of Hopalong Hollow

I rather like it. Maybe that's because we had to re-plaster so many walls in our own home.  Our home is only 120 years old, so there was no beautiful old brick beneath, just lathe.

 The fabulous  British series, Restoration home, recreated the plaster on a 1613 timber frame house, and the plaster is quite smooth. But I like the bumpy look on Trimble Manor
 I made the chunky "axed" corbels to replace the skinny, cruddy ones in the kit.
  Tomorrow, I will be thatching the top roof.... hope you'll stay tuned!

Wednesday, January 11, 2017

Making leaded windows.... so cool.

Welcome to Trimble Manor
'
I've finished the stonework on my front entrance.
  
 The bay windows provided  in this kit were pretty mundane.  The "glass" and window frames were not worthy of  Trimble Manor.
 Here is what came with the kit:

Thin sheets of acetate with diamond markings and thin strips of wood with blunt ends for the frames.
I'm going to upgrade these windows.
I have a roll of lead golfers tape which I've cut into thin strips sufficient to cover the white marks on the acetate.
Once I've stuck the tape to the surface of the acetate, I need to "work" it with my little stylus. I gently push it and shape it to create a more dimensional look.
 You can clearly see the difference after the tape has been worked.
 Next, I wanted to diminish  the silvery shine on these window panes, because aged lead windows would have more of a pewter color than silver. To do it, I used a black permanent marker to go over each strip of lead, one by one, immediately wiping it off with a damp Q-tip. This left a dull patina on my lead.
Next, as I did with my wooden windows, I created wavy old glass using the Triple Thick  gloss glaze carefully painted between each little diamond pane.
I made 12 of these windows.

 Next I made nice window frames using a beveled 1/2 molding found at Home Depot. Using my little mini miter saw, I cut the wood for each window AFTER I had painted and antiqued it.

  See here!

Add a window box..

Another substitution I made on this kit house, was the timber on the front and sides of the manor.


 Because this is a timber, plaster and stone building, I wanted the main timbers to look like they could actually support such a structure; they needed to look hefty and strong and as if they were cut with an ax , a mouse's ax of course.

  I want a slightly crook-edy and uneven look.

 The balcony that came in the kit was not my cuppa tea.
 Here it is before....
 I know the gingerbread is cute, but it isn't appropriate for my house, so I removed it. Maybe I will be able to use it elsewhere, for a fence or something.

Again, I want something more sturdy. I mean, what if a rat comes to visit and leans on that balcony? We don't want the entire railing to come crashing down, do we??!

 I made a better railing...
One that can't fail.


Even 3 mice could lean over this balcony at the same time!
  I ran out of window molding, need to take a trip to the store. In the meantime, I will finish the mortar work. Soon I will be plastering between the timbers.

Saturday, December 31, 2016

Bricking and shingling the mouse house turret

I've built the main Structure for my Mouse stories. Now, I want to add the special touches that turn a rather ordinary house, into a Dwelling Magnifique.
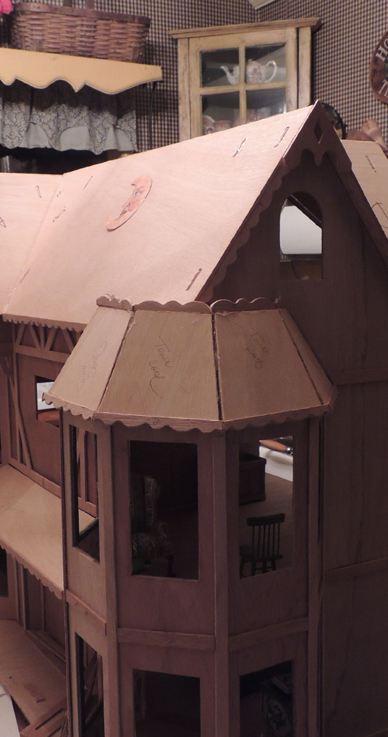
 I looked at dozens of choices for roofing, and believe me, there is an amazing array of materials for miniaturists to use. In the end I decided upon something a mouse actually COULD use as an efficient, practical and easily available source for roofing.
The remarkably humble Pinecone.
 This makes incredible roofing, fitting so beautifully around the turret roof as if it were made for the job.
 This is where a hot glue gun is of the essence!
 Let the rains fall as they may, not a single drop of water will seep through this roof! I will use the pinecone shingles on the PORCH roof as well.

  I'll need to use some wood putty to fill in fretwork trim corners, at the base of roof.
.
The large MAIN roof will be not covered in pine-cone shingles, but another material altogether.

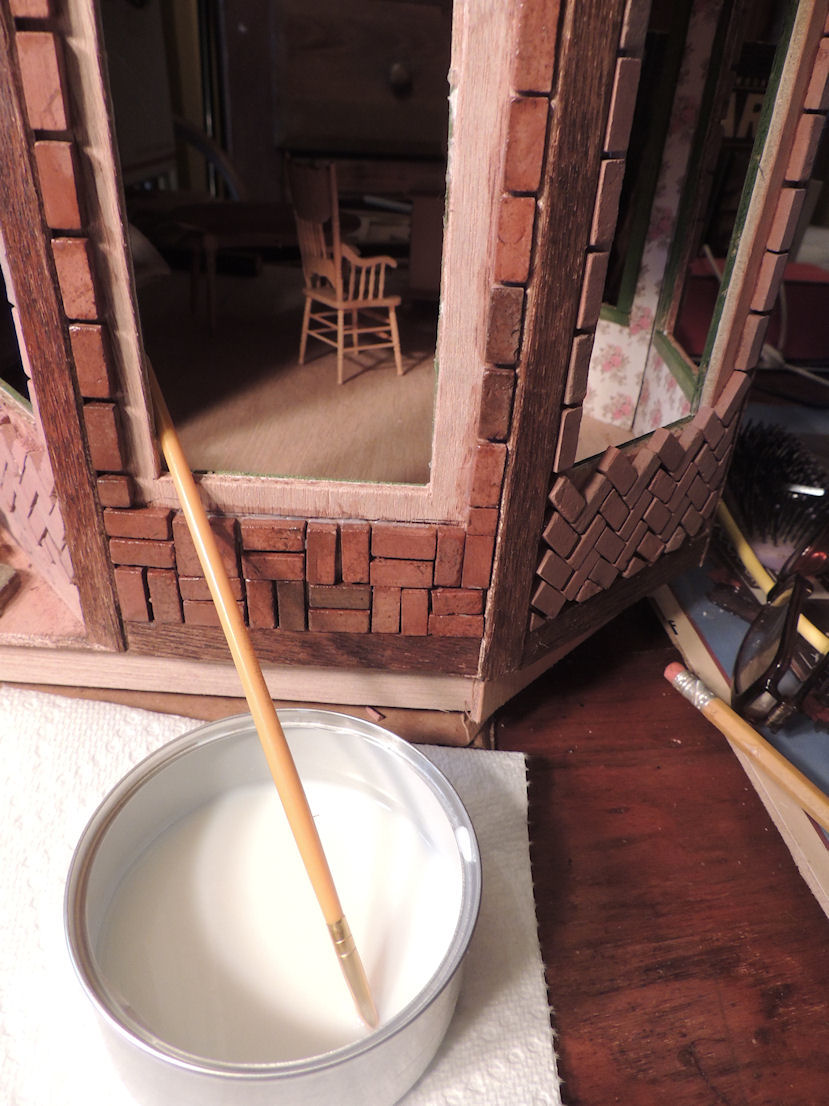
 To brick the turret, I purchased teeny bricks in a red blend mixture. 
I should not have put that window in beforehand, and will need to remove it.

Using tacky glue as my cement. I carefully laid two alternating patterns on  the octagonal  turret sides, a herringbone and a foursquare. Bricking patterns were often mixed on early Tudor houses. (though I doubt they used pine-cone roofing)
The little bricks are easily cut to fit with an xacto knife. I will need to do a lot of trimming around the windows before I can put the window frames in.
 After the bricks are set, I brush  them with a clear polyurethane.

Before the Polyurethane, the brick color is rather dull and flat looking.
As I brush on the finish,
 The bricks begin to take on a rich deep color.
.

I got ahead of myself and mortared the brick on one small section under a window, then realized I needed to wait 24 hours for the poly to dry thoroughly, ooops!


 For mortar, I'll be using Elmers Wood filler AND a mixture made especially for the purpose.I don't like the stark white and therefore, I think I'll mix in a bit of brown acrylic paint to give the mortar an old look.
I will use stone  and brick on the lower front of the house and a stucco finish on the upper half of the house.
  Building this house is really fun, let me tell you!  It would be a marvelous project to do with an older child.
Though I intend for this house to become the backdrop for my next book, I can easily see the house itself becoming a focus for several stories featuring my mouse. In fact, as I've been building it, 3 new stories have been stirring in my head and I find myself alternating between gluing on bricks, and typing paragraphs into my laptop.
 You just never know where things may lead.....

Monday, December 26, 2016

The building of a cunning dwelling..for a mouse.

As a part of a bigger scheme, over the winter, I am building a house.... not just any old house, but a house for a mouse.
 This is the mouse...
 and here is the house.
 This doll house kit has been sitting under my bed for over a year. The goal is to create  an "Artists Model" of sorts. The house you see on the cover of the box will be transformed into something quite different by the time I am finished with it.
 I have tiny red bricks, thatch, and wallpaper, mortar and stucco mixture to do the
transformation from "standard Tudor doll house" to a CUNNING and Wonderful Dwelling
for a mouse.


 I've been collecting small household goods and furniture for some time. But it will take an awful lot to fill this cottage. Just think of all the things in YOUR house!
 It's not a difficult project; the directions are straightforward, the parts are easily punched out from the perforated sheets of wood.
Things move along pretty quickly.
 With glue, paint and patience, the building parts are coming together nicely.

    Although, the Tudor House in the Picture is quite charming, it is not what I have in  mind for it's occupant.

 This house is to become a cunning brick, stone, timber and plaster cottage occupied by THIS particular mouse, who's name starts with P.  She is the character in the first book from my New book series.

This will be a set of small books, in the tradition of Brambly Hedge, Beatrix Potter and Brambledown Tales. I have chosen a unique book size, something square, and in-between the size of the aforementioned books.

                       In all my Large Books I feature the home of the character, that is because I   love houses and each domain says something about the personality and lifestyle of it's inhabitants.

Below is Mamsey Bears House
 And this is the home of Hopalong Jack and his family.
 and this is a partial view of the home of the
 Bushybottom Squirrels


 All of  these dwellings come purely out of the imagination, but
for  this new book, I want to draw from an actual "house", I think it will be so much fun to build it from the ground up, so to speak.  Over the years, I've made so many sketches of storybook cottages, that I hoped one day to  build one as my real studio.... until that day, I will work on this smaller scale; it's a lot easier on the pocketbook.
  
.
 Follow along with me, as I build the cottage, and illustrate the book...
 It should be fun!