According to Harpers Young People, April 1881, "The giving of an egg as a mark of friendship or love is as old as the
ark, of which it is a symbol; for the ancients used it as a sign of
resurrection, and brought eggs to the alters for their gods as gifts."
Today I want to show you a simply lovely way to decorate your eggs for Easter this year using the Victorian craft of egg scratching, also known as Scraffito or Driapanki. These unique eggs are wonderful tucked in a little box of straw as a gift.
I am fortunate to have eggs of all shapes and sizes here in the Hollow. Everyone is laying eggs hereabouts; some of these eggs are fertilized, ( chicken and ducks) and some are not fertilized ( goose and peahen). I only tell you this because IF my goose and peahen eggs WERE fertilized, I would let their mothers hatch them. (AS for the chickens and ducks, we have enough of those folk running around already.)You can use any type of egg you like.
All we need are the shells, but the inside of the eggs will not go to waste. I will need to blow out all of these eggs...phew!
Of course, you may blow out the yolks by pricking a small hole in both ends of the eggs and then blowing out the insides, but with this many eggs, I am happy to have a handy dandy egg blower
My darling daughter in law bought this for me along with Pysanki kit, we'll try that another day. You can purchase an egg blower online from any company selling Ukrainian egg supplies. It makes the emptying so easy!
I will scramble eggs and and allow all the birds to partake of the feast; yes, birds do like to eat their own eggs.

Now, because I want an
old folk-art look to my eggs, I will dye them earthy tones. My main batch is dyed with onion skins. Just put your water and onion skins in a stainless steel pot and bring to a simmer. Add your emptied eggs to the water and leave them in the dye bath till you have the desired color.
Isn't that a beautiful rusty shade?!
Next, I added a bit of walnut ink to the same water to create a deep red egg.
For some earth green eggs, I experimented with a few Rit dye colors and then added a handful of real moss..
Now I have these beautiful muted colors.
We are going to scratch into these eggs using a craft knife. You can freehand a design on your egg, or draw it first with a white watercolor pencil as I have done here on the egg to your left.
It doesn't hurt to have a few rough ideas sketched out in a notebook...
Holding your egg ,( NOT TOO FIRMLY, YOU DON'T WANT TO CRACK IT) begin to lightly carve into the egg with your knife. You are simply taking away the layer of dye to expose the white shell beneath. I found the duck eggs best to use because the shells are very hard. This simple folk-ish design was done with the craft knife. Slow and steady is the trick.
I did about 5 eggs with my exacto knife... and then, James said, "Why don't you use your Dremel instead?!" FABULOUS IDEA DEAR!
WOW, what a difference. I was able to work much faster with this engraving tool. But you don't have as much control as with a hand tool. If you have a Dremel, try it. If you don't, no problem, the effects are nice either way. My method is to draw the outlines with the Dremel and the tiny details with the knife.
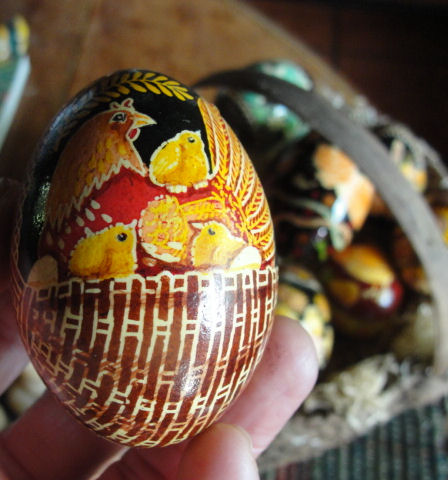
Foxglove, flowers, bees, birds, vines, chicken and rabbits are all excellent subject matter for this type of egg.
I am still working on this hen, she is scratched into a peahen egg.
Birds are beautiful on any surface. This is a peahen egg as well. It is slightly larger that a duck egg.
The green egg almost looks like marble, I love the color.
Try various stylized borders to encircle your subject.
You can scratch your designs all the way around the egg.
When your eggs are finished, rub some cooking oil onto the surface or spray a thin coat of poly-urethane. I just rubbed these with corn oil.
They are lovely in a grouping or all alone on a bed of moss.
I still have a many more to engrave and plenty of ideas. Use your imagination, these can be simple or detailed, according to your taste. Can't wait to carve into that big goose egg!
To re-cap; draw your design on the egg...
and scratch away.
Here is my goose egg!
You can fill in some of the white areas with ink or watercolor if you wish.
The gorgeous eggs beneath were scratched in 1883 with a pen knife by a Susan Smyser and are displayed in the Historical Museum of York, PA.
Let me know if you try this egg craft, I would love to see what you come up with!
If you want to try another lovely egg craft, visit my post from April 2,2010 entitiled "Bunwinkies and Hopalongs" to learn how to make stenciled eggs..


 SWEET!


 .
. 


 .
.


 .
.

 .
.

 ,
,
 '
' .
.


 .
.
 .
.


 ,
,


 .
. .
. .
.


